You might have asked yourself now and then „How do I make a soft skin without destroying the pores?“. In this workshop I’ll show you how this kind of touch-up works, and how you can conserve the pores. This goes from basic retouch up to powdering the skin.

Basic retouch
Before we start softening the skin, you should perform a so-called basic retouch. This means that zits, moles and other blemishes are removed. How much you want to weaken things depends entirely on your personal taste, of course.
Before we start softening the skin, you should perform a so-called basic retouch. This means that zits, moles and other blemishes are removed. How much you want to weaken things depends entirely on your personal taste, of course.
Contrary to the Clone Stamp tool which transfers areas exactly as in the original, the Healing Brush tool works by cross-calculating brightness values and thus removing blemishes very cleanly, adapted to the surrounding area.
Skin powdering
Now we get around to doing the so-called skin “powdering”. Duplicate the layer with Layer > Duplicate Layers or Ctrl+J and give the new layer a Vivid Light blending mode.

Press Ctrl+I or use Image > Adjustments > Invert to invert the current layer. Whatever you may see on the screen now: Don’t get confused by that, we’re still on the right track even though it might look a bit funny.
Apply Filter > Blur > Gaussian Blur with a radius of about one pixel. Here you should choose a radius just small enough so you can barely see the pores anymore.
Next, use the High Pass filter which you can find under Filter > Other. With this one it’s a matter of taste how strongly you apply it. I usually keep the radius between 20 and 40 pixels.
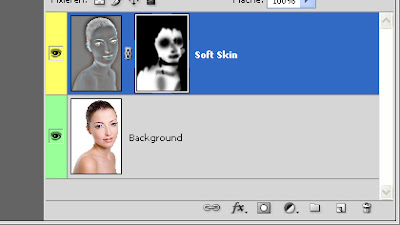
This change should not be applied everywhere. Select Layer > Layer Mask > Hide All to create a black mask that hides all layer content for now.
Tip: You can also create a black mask by clicking on the Add Layer Mask button in the layer palette and holding the Alt key.

Now use a white foreground color to paint the changes back into the image, but only on the skin. Don’t start off with an opacity of 100%, but experiment a little with the strength instead. You’ll see how the skin becomes noticeably softer and the pores are kept intact.
Tip: If you select Filter > Convert for Smart Filters right after inverting the image, you can do all this retouching in a completely non-destructive way.


